_1777451497595.webp)
How to Install WPC Decking Easily: A Step-by-Step Tutorial for Beginners
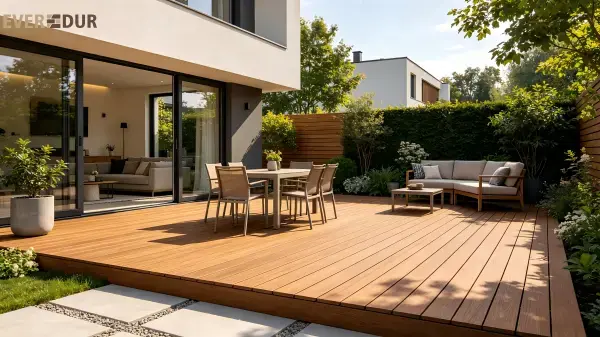
The installation of WPC decking outside seems to be a complex operation at first sight. But with a little planning, and a basic set of methods, most beginners can have a stunning, enduring deck in place within a weekend. WPC (Wood Plastic Composite) decking boards are composed of a mix of wood fiber and recycled HDPE plastic. They are a viable alternative to standard hardwood for patios, pool surrounds, villa gardens and balconies since they resist moisture, mildew and UV deterioration. Composite boards don’t need to be coated, painted or stained each year as genuine wood does, which may save a lot of effort in the long run. Makes sense to put in Read your Location Pour the base in Set the joists in place Fasten the boards using concealed fasteners. Trim the edges flush Knowing each step before you begin will save you expensive errors, whether you’re a homeowner wanting to renovate your backyard or a contractor creating a residential terrace. This session will guide you step by step, explaining not only what to do but why it is crucial for durability and look, all in basic language. By the time you finish this course, you will have the knowledge and confidence to plan and construct a proper outdoor composite deck installation.
What Tools and Materials Do You Need to Install WPC Decking?
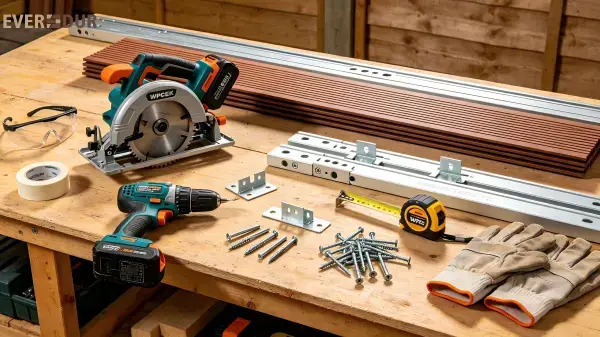
Preparation is what makes for a smooth setup and a difficult install. Before you get started, ensure you have all of your equipment and supplies on hand so that you may spend less time racing to the hardware store and more time in a groove.
Tools you will need:
- Circular saw or miter saw (with a fine-tooth blade suited for composite material)
- Cordless drill with Phillips and hex-head bits
- Tape measure and chalk line
- Speed square and pencil
- Rubber mallet
- Level (at least 1.2 m long)
- Safety glasses and hearing protection
- Protective gloves
Materials required:
- Wood Grain Composite Deck Board boards in your chosen profile and color
- Aluminum or galvanized steel joists (avoid raw steel — it corrodes)
- Hidden T-clips or start clips (typically supplied with the decking)
- Stainless steel screws or self-drilling composite screws
- Joist tape (protects the top surface of the substructure from moisture pooling)
- End caps and fascia trim boards for a finished perimeter look
- Concrete anchors or post bases if you are building over a hard surface
A practical remark on saw blades, composite boards are denser than softwood thus a typical wood blade will overheat and produce a rough cut edge. For clean results use a blade with 60 or more teeth and a carbide tip. When cutting with a circular saw, always face the side up to reduce splintering on the visible surface.
Check the Specifications for your Board before buying Fasteners. Decking profiles come in different widths – standard sizes are 135 mm to 150 mm wide – and the kind of clip has to fit the geometry of the groove of the profile of the board you choose. Uneven spacing and loose boards are caused by mismatched clips.
WPC Decking Site Preparation and Joist Spacing Before Installation
Site preparation will dictate how your deck performs during years of outdoor exposure. One of the most typical reasons of boards drooping, creaking, or being uneven down the line is skipping this step or hurrying through it.
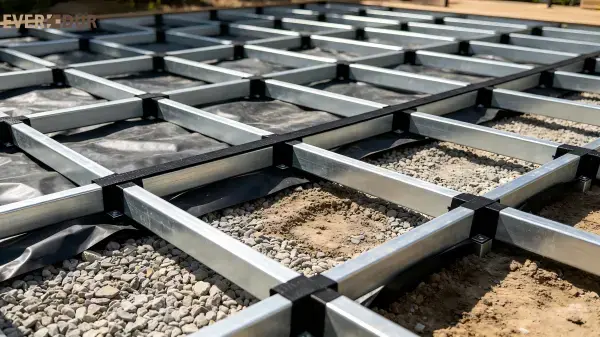
Check the floor. Composite decking should be installed on a strong level basis. Before you make post bases or concrete footings, lay a weed-suppressant membrane over the soil and crush gravel to help drainage. Construct the floor on top of an existing concrete slab, with a little slope (a gradient of 1-2% is OK) so rainfall drains away from the structure and doesn’t pool beneath the boards.
Build the joist frame . For outdoor installations, joists should be aluminum or hot-dip galvanized steel. Timber joists are sometimes used, although they have to be treated with preservative and are more subject to seasonal movement. Space joists at 300 – 400 mm centers for solid composite boards or 400 mm for hollow profiles – verify the board manufacturer's load-span data to ensure the right spacing for the profile you are using.
Direction of joists is important. Joists must be oriented perpendicular to the direction of deck board installation. If your deck is running north and south, the joists go east and west. This perpendicular connection distributes the force uniformly and there is no localized flexing .
Use joist tape. Place self-adhesive joist tape on the upper surface of each joist before laying any boards. This tape provides a barrier between the metal and composite, preventing moisture from being trapped, and reduces the tiny squeaking that may happen when boards move slightly with thermal expansion.
Allow a minimum of 5 mm clearance between the deck frame and any wall or building. This expansion space allows for ventilation of the underside and avoids moisture build-up against the brickwork or cladding.
How to Install WPC Decking Boards with Joists and Clips?
You may start placing boards with the substructure level and square. Most composite deck board systems use a concealed clip fastener system, which hides the fasteners between boards for a clean, fastener-free appearance.
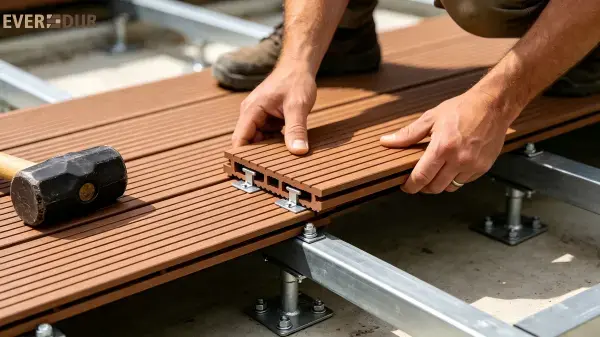
Begin at the end closest to the home or a permanent wall. Please install a start clip on your first joist using the correct screw. Slide the first board's groove over the start clip, push it flat and check it for straight with your chalk line. The initial board determines how all future boards are oriented, so be sure it is correct.
Start with the first board placed and work outward, inserting a T-clip into the groove of the board just inserted. Screw the clip to the joist and then push the groove of the next board onto the projecting edge of the clip. The clip retains the previous board and spaces the next one at the same time, usually leaving a 3–5 mm gap for drainage and heat movement. Rather of pressing a board into place by hand, use a rubber mallet to completely seat each board.
Make sure each clip is properly attached at joist junctions. When loose clips are used, the ends of the boards tend to raise with foot activity or temperature change. If a concealed clip is not appropriate, for example near walls or at the edge of the deck, face-screw at a slight angle through the board into the joist and cover the hole with a color-matched composite plug or end cap.
If a whole board won’t fit, cut the end board to width using your circular saw. Measure twice, at either end of the run, as rooms and gardens seldom have completely parallel walls.
WPC Decking Board Alignment, Spacing and Hidden Fastener Techniques
Consistent board alignment, and good spacing, are the difference between a professional-looking work and an amateur. Even little deviations add up over a lengthy run, so verify alignment every four or five boards, not only at the beginning and end.
Stretch a chalk line across the face of the installed boards at regular intervals. If the line reveals drift, adjust the next board's position slightly before clicking in the clip. A 1 mm correction per board is almost invisible but prevents a 10 mm cumulative error by the time you reach the far edge.
Spacing between boards serves two practical purposes: water drainage and thermal expansion. Wood grain Wood Grain WPC Decking boards expand and contract with temperature changes — this is normal composite behavior, not a defect. In climates with significant seasonal temperature swings (common in northern Europe and much of North America), maintain a 5 mm gap between board ends at butt joints and a 3–5 mm gap along the sides. Where boards meet end-to-end over a joist, both boards should land on the same joist with a 5 mm gap between their cut ends.
Hidden fasteners — T-clips and start/end clips — are engineered to hold this spacing automatically when inserted correctly. If a clip allows a board to slide and close the gap, the clip is either the wrong size for the groove or has not been fully seated. Remove it, check the fit, and re-install.
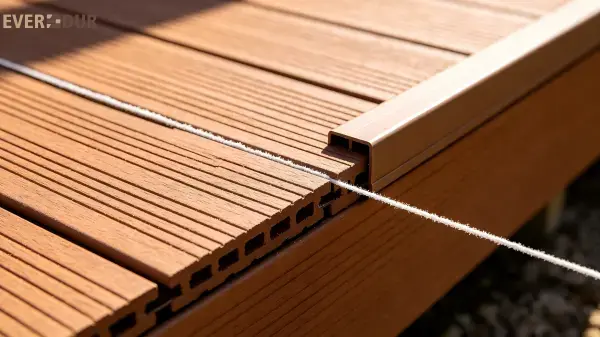
At corners and perimeter edges, use a fascia board or trim piece to enclose the exposed joist frame and board ends. Fascia trim is secured with stainless steel screws at roughly 400 mm intervals, with cut ends sealed using color-matched end caps to prevent moisture ingress at the most vulnerable point of any composite board.
How to Finish and Maintain WPC Decking After Installation?
Once all boards are laid and edges are trimmed, the installation work is essentially complete — but a few finishing steps protect your investment and keep the deck looking its best from the outset.
Inspect every board and fixing. Walk the completed deck and press down on each board, especially near the ends. Any hollow sound or movement indicates a clip that has not engaged the groove properly or a joist that needs an additional fastener. Address these before use, as foot traffic will worsen any looseness over time.
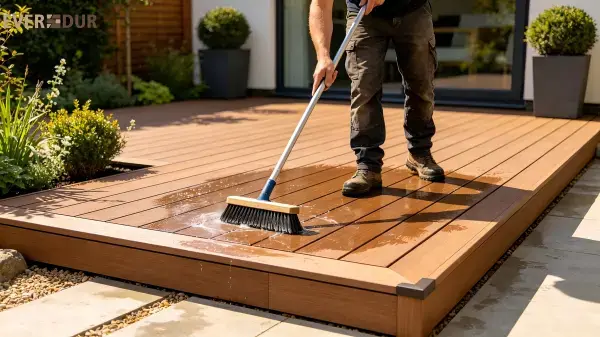
Clean the surface before opening for use. Sawdust, adhesive residue, and scuff marks from installation are easiest to remove while fresh. Wash the deck with warm soapy water and a soft-bristle brush, then rinse thoroughly. Avoid abrasive scourers that scratch the surface texture.
Ongoing maintenance is genuinely minimal. Sweep away leaves and debris regularly, particularly in autumn, to prevent organic material from breaking down in the board gaps and creating conditions where mold spores can settle. A seasonal wash with a mild detergent and a garden hose is adequate for most residential settings. Avoid pressure washers set above 1,500 PSI; high pressure can lift surface texture on embossed or brushed profiles.
Check fixings annually. After the first full cycle of seasons, inspect a sample of clips to confirm that thermal movement has not loosened any screws. Stainless steel fasteners resist corrosion, but it takes only a few minutes per year to confirm everything remains tight. Composite boards themselves do not rot, splinter, or require repainting — the maintenance commitment over a 10–25 year service life is genuinely low compared with natural timber.
Conclusion
Installing WPC Decking composite outdoor decking is a manageable project when you work through each stage methodically — from site assessment and joist layout to board alignment and clip fastening. The key variables are a level, well-drained substructure, correct joist spacing for the specific board profile, and consistent gap management throughout the installation. Done correctly, a composite deck requires minimal upkeep and retains its appearance across many outdoor seasons.
FAQ
Q: How much gap should I leave between WPC decking boards?
A: A 3–5 mm side gap and a 5 mm end gap at butt joints are standard recommendations. These gaps accommodate thermal expansion and allow rainwater to drain freely. In regions with extreme temperature ranges, lean toward the larger end of that tolerance.
Q: Can I install composite decking directly on soil or grass?
A: No. Composite boards must be installed over a rigid, well-drained substructure — typically aluminum joists set on concrete footings or a compacted gravel bed. Direct ground contact traps moisture beneath the boards and can affect the substructure's stability over time.
Q: Do I need special tools to cut WPC decking boards?
A: A standard miter saw or circular saw works well, but you must use a carbide-tipped fine-tooth blade (60 teeth or more). Standard wood blades overheat on dense composite material, producing rough edges and shortening blade life significantly.
Get in Touch with Durable — Your Reliable WPC Decking Manufacturer
For Construction Firms and Contractors: Access project-based technical support, verified load-span data for our profiles, and flexible lead times that align with your build schedule. We supply compliant materials backed by CE (EU), ASTM D7039 (US), and GB/T 24137 (China) standards, with FSC, REACH, RoHS, and Intertek certifications available for documentation on request.
For Building Materials Wholesalers and Resellers: Competitive wholesale pricing, consistent batch quality managed under ISO 9001 and ISO 14001 systems, and an annual capacity exceeding 1,500 containers mean your supply chain stays reliable. Request free samples to evaluate finish quality and surface texture before committing to volume.
For End Customers and Homeowners: We provide free design consultation and installation guidance to help you choose the right profile, color, and substructure configuration for your outdoor space. Our composite deck boards meet Recycled Content certification requirements and E0 environmental standards — a responsible choice for families and the environment alike.
Contact our team directly at violet@wpcsupplier.com to discuss your project requirements. As an experienced WPC decking manufacturer, Durable is ready to support your outdoor project from first inquiry to final installation.
References
1. American Society for Testing and Materials. Standard Specification for Evaluation of Durability of Wood-Plastic Composite Products (ASTM D7032). ASTM International.
2. Forest Stewardship Council. FSC Certification Standards for Chain of Custody. FSC International Center, Bonn.
3. European Committee for Standardization. EN 15534: Composites Made from Cellulose-Based Materials and Thermoplastics (Usually Called Wood-Polymer Composites or Natural Fibre Composites). CEN, Brussels.
4. Klyosov, A. A. Wood-Plastic Composites. John Wiley & Sons, Hoboken, New Jersey.
5. International Organization for Standardization. ISO 9001: Quality Management Systems — Requirements. ISO, Geneva.
6. Clemons, C. M. "Wood-Plastic Composites in the United States: The Interfacing of Two Industries." Forest Products Journal, vol. 52, no. 6, 2002, pp. 10–18.
7. RoHS Directive 2011/65/EU. Restriction of the Use of Certain Hazardous Substances in Electrical and Electronic Equipment. Official Journal of the European Union.

Send Inquiry
You may like