_1777451497595.webp)
WPC Composite Fencing Installation: Easy Guide for Beginners
Installing a new fence can feel overwhelming, especially when you're working with a material you haven't used before. The good news is that WPC composite fencing is genuinely one of the more approachable outdoor fencing materials available today — and once you understand the logic behind the process, each step follows naturally from the last.
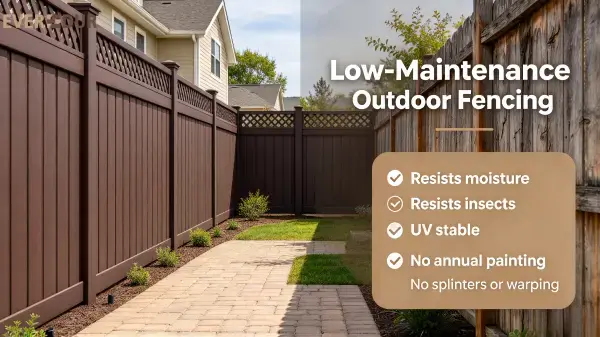
WPC (wood-plastic composite) fencing combines wood fiber with recycled HDPE plastic, producing panels that resist moisture, insects, and UV exposure without the annual maintenance burden of traditional timber. Unlike painted softwood, it won't peel, splinter, or warp through seasonal temperature shifts. For homeowners and contractors across Europe and North America, that durability translates directly into lower lifetime costs and less weekend labour.
This guide walks you through the complete installation process from initial measurements to final inspection. Whether you're fencing a residential garden, a villa boundary, or a commercial landscape project, the principles remain the same. We'll cover site preparation, post setting, panel fitting, gate integration, corner detailing, and post-installation checks — giving you a clear, practical roadmap before a single post hole is dug.
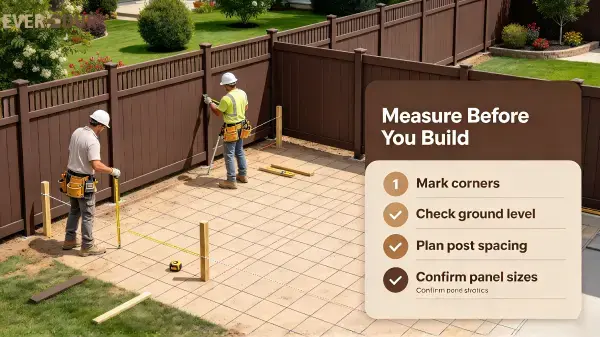
What Should You Measure Before Installing WPC Composite Fencing?
For a clean, skilled installation, it's important to measure things correctly. If you skip this step or hurry through it, you'll waste materials, get panels out of alignment, and have to pay a lot to fix them.
Start with the edges. Walk along the whole line you want to fence and put a stake in each corner. Use a measuring tape to write down how many linear meters of fencing you need in total, and then write down each run separately. Knowing where cuts will fall helps you plan how much material to order without buying too much. Runs rarely come out to exact panel multiples.
Make sure the ground is level. There are many garden borders that slope, and even a small slope can change how you set your posts and whether you need raked or stepped panel arrangements. With a spirit level and a long straight edge, you can find any big changes in height between each run. Write down the highest and lowest points. This will help you decide if you need extra pieces at the base or if stepping the installation is better.
Check the local rules. Permitted building rules in the UK let people build fences up to 2 meters high around their properties without getting planning permission. In many US cities and towns and across most of Europe, the same rules apply. Make sure you know the maximum height for your area before you describe the panel and post sizes.
Figure out your post spacing. The standard distance between panels is usually between 1.8 m and 2.4 m, but this can change depending on the width of the panels and the structural needs of your fence run. Before you order, draw out where the posts will go on paper, making sure to include corners, gate openings, and any changes in ground level. By planning ahead, you can avoid the stressful situation of finding out during installation that a post position conflicts with a tree root or an underground service.
Lastly, write down the exact width, thickness, and length of each panel so that you can figure out how many boards or privacy panels you need for each bay. Allow a small amount of extra for cuts and possible loss.
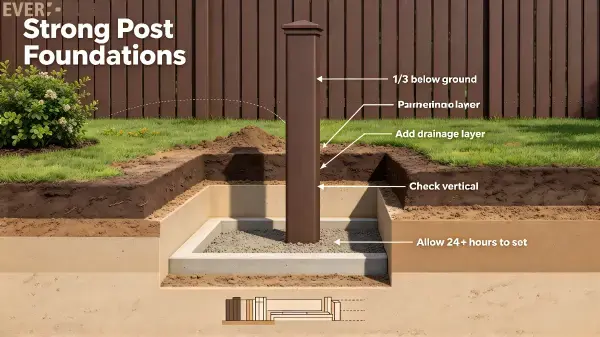
WPC Composite Fencing Posts, Foundations, and Spacing Explained
Since the posts hold up your fence, you should be very careful when you place them. If the posts under the panel are too small or not properly fixed, it could lean or rack within months, even if it looks great on the first day.
Choosing what to write about. For composite panel systems, the most popular post types are aluminum and steel. Both systems are resistant to rust, so they can be used outside, and plastic panels can fit easily into the channel or clip system without the need for glue. Wooden posts can also be used, but they need to be treated so they can touch the ground, and some clip systems may not work with them.
Soil and post depth. As a good general rule, one-third of the length of the post should be below ground. For a fence that is 1.8 m above the ground, that means that the total length of the posts must be about 2.7 m, with about 0.9 m of them being buried. Use a post-hole digger or an auger attachment to dig post holes. Digging by hand in hard, compacted, or clay-heavy soil is hard work that often results in holes that aren't level. Post-mix or regular concrete should be mixed and poured around the post. Before the concrete sets, use a spirit level to check that two nearby faces are straight. Wait at least 24 hours before putting any lateral load on it.
Thoughts on spacing. The maximum distance between posts is based on the length of the panel. For panels that are up to 1.8 m long, the distance between posts should be about 1.8 m center-to-center. Wider spans could bend in a way that can be seen when the wind blows. Place the posts exactly where the corners are, and use the right corner hooks or cut the panels in half to keep the fence line straight.
Drainage at the base Before you pour the concrete, put a layer of dirt at the bottom of each post hole. This makes it more likely for water to drain away from the base of the post instead of pooling there. This makes both the post and any groundwork around it last longer.
How to Install WPC Composite Fencing Panels Step by Step
Once the posts are in place and the concrete has hardened, installing the panels doesn't take long. Before you start, set out all of the panels, clips, and fixes so that nothing gets in the way of your work in the middle of the bay.
Attach the bottom rail or channel to the posts at the base height you want, making sure there is at least 50 mm of space between the bottom edge of the panel and the finished ground level. This space keeps water from pooling against the panel base after it rains hard and lets air flow under the fence run.
The first board should be slid or clipped into the bottom rail. Most WPC fence systems have a hidden clip system that fits between two boards next to each other. This gets rid of the need for face-fix screws and makes the finished panel face look clean. Before moving on to the next board, make sure that each clip is tightly in place in its groove on the top edge of the board that is already in place. As you work your way up the bay, use a level to make sure that the boards stay flat every so often.
In order given by the maker, attach the top rail or finishing piece to the posts at the top of the bay. Use a fine-tooth saw blade to cut any boards that need to be cut at corners or gate holes. The right blade will cut composite material neatly and without splintering.
WPC Composite Fencing Gates, Corners, and Finishing Details
Specifics like gates and corners are what set a clean installation apart from one that looks like it was thrown together on the spot. Plan both of them carefully during the stage of measuring.
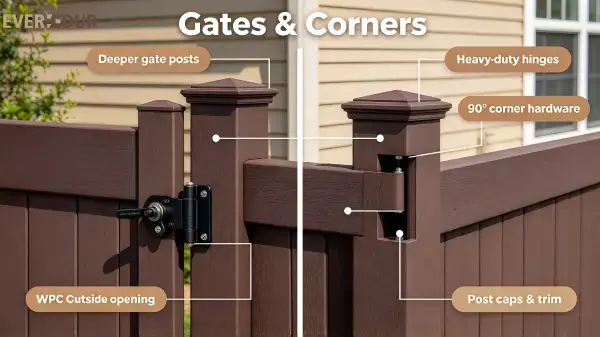
For gate openings, set up a pair of gate posts that are deeper in the ground (about 1.2 m) to handle the dynamic loads that a moving gate puts on them. Heavy-duty gate hinges that can hold the weight of your gate screen should be used. Composite gate frames usually have a skin made of WPC board and an internal subframe made of aluminum or steel for strength. Make sure you know how much the whole gate weighs before choosing hinges.
When two posts meet at an outside corner, they are usually butted together at a 90-degree angle and connected with corner post hardware. At the corner joint, the panels on each run come to an end. Some systems come with corner posts that are custom made and have two channels, which makes alignment a lot easier. The idea behind internal corners is the same, but they mirror the geometry.
Covering rails, post caps, and trim pieces finish off the look of the installation. Post caps keep water out of open post tops and should be put on every post, no matter what the weather is like. Trim pieces cover any cut edges that are visible at the base or at gate holes. This gives the whole fence run a finished look that is uniform.
How to Check WPC Composite Fencing After Installation
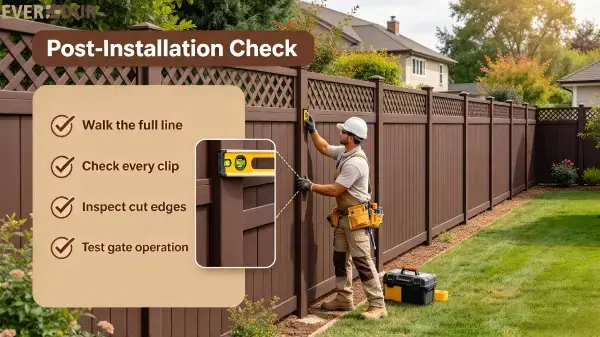
An organized inspection after installation finds small problems before they get worse. Wait 48 hours after the last pour of concrete to do the check, this way all the foundations have had time to fully cure.
Walk along the whole fence line and look down each run from one end. The vertical posts should look straight, and the panels should either sit level or follow the stepped or raked profile that was planned without any twisting that can be seen. If a post moved a little while the concrete was setting, now is the time to find it and fix it.
Check each and every clip and screw. There shouldn't be any space between the clips and the board grooves. Loose clips allow the board to move and make noise when the wind blows. Firmly press any clips that don't look right back into place. If a clip bent while being installed, it needs to be replaced.
Check the sides of the cuts at the corners and gate holes. Any cut surfaces that are visible should have a UV-stable end-grain sealant put on them, especially on standard extruded profiles. The protective shell that covers the whole surface of WPC waterproof fencing panels made with co-extrusion technology makes sealing the cut edges less useful in high-moisture areas, but it's still there.
Lastly, test how the gate works. The gate should be able to swing open and shut without snagging on the ground or getting stuck at the latch. It's easy to make small changes to the settings of the hinges at this point; it gets much harder to do so after the fence has been used for a season.
Conclusion
There are three basic things that are needed to install composite fence correctly: exact measurements, strong post foundations, and careful panel fitting. Every step builds on the last, and spending time on the planning stage always leads to better results than getting to the work that can be seen. WPC outdoor fencing is a practical and low-maintenance option for gardens, villas, and commercial landscapes with WPC composite fencing. With the right help, even a beginner can make their work look and work like it was done by a pro.
FAQ
Q: Do I need planning permission to install a WPC fence in my garden?
A: In many European nations and US communities fences of a certain height, often 2 metres, may be built without official planning authorisation. Not all requirements are the same in every area so verify with your local government before starting any installation work.
Q: How much gap should I leave between composite fence boards?
A: The vast majority of composite fence systems are produced as close-board privacy panels, not as individual spaced boards, therefore the gaps are established by the clip system and not by hand spacing. For a slatted installation, follow the manufacturer's specified spacing, often 10–15 mm, to allow for slight thermal movement.
Q: Can composite fencing panels be cut to fit non-standard spaces?
A: Yes. Composite panels cut neatly with a fine tooth circular or hand saw. Cutting: Measure twice, cut once. Any exposed cut edges should be sealed with an appropriate sealant to preserve the aesthetics and moisture resistance of the completed installation.
Partner With Everdur for Your Next Composite Fencing Project
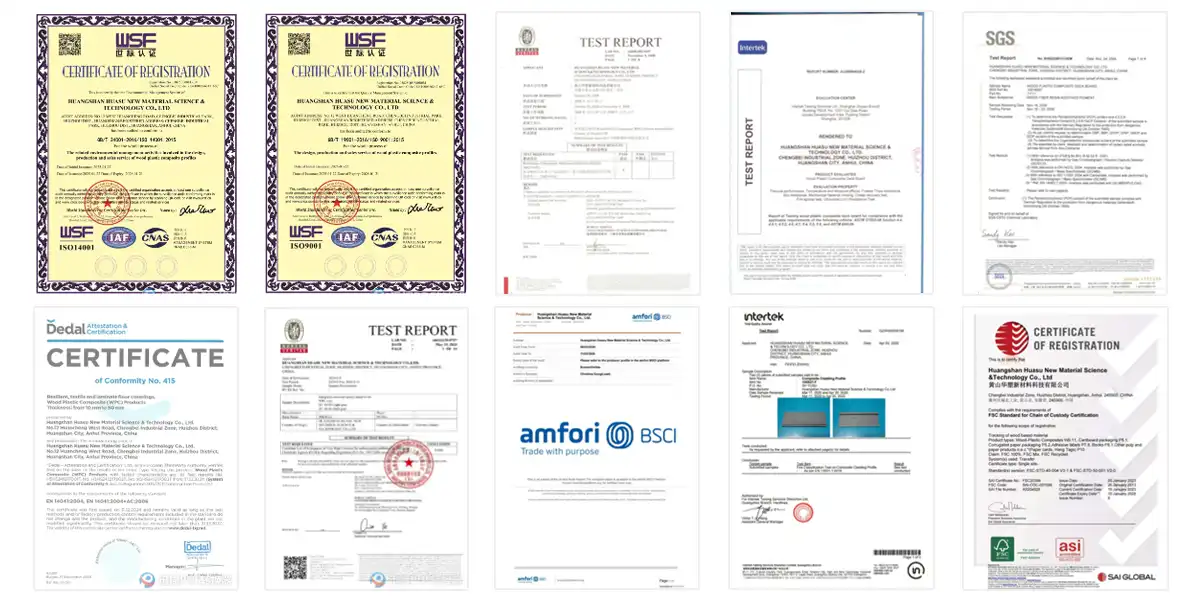
For building companies and fence builders: Everdur provides project-based technical help, consistent wait times, and the ability to give more than 1,500 containers per year. Our factory is certified by ISO 9001 for quality management and ISO 14001 for environmental management. Our products have been tested to meet EU CE standards, US ASTM D7039 standards, and Chinese GB/T 24137 standards. Classic hollow profiles come with a 5-year warranty, while solid co-extrusion panels come with a 20-year warranty. Project details can be found in the paperwork.
For building material resellers and wholesalers: We offer special trade price structures and free samples so that you can try out our whole range. As a WPC composite fencing manufacturer, we can offer OEM and ODM services, as well as custom color matching and profile sizes that are made to fit the needs of your local market.
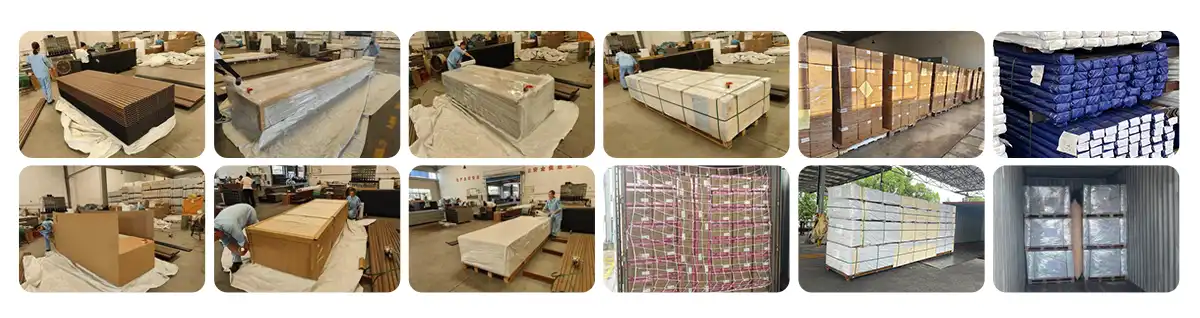
For the end users: With every order, you can get free planning advice and step-by-step installation instructions. All of the panels are made from recycled HDPE and meet E0 environmental standards. This means that you can stick to your environmental goals without sacrificing performance outside.
Contact our team at violet@wpcsupplier.com to talk about the needs of your project, get samples, or get a quote.
References
1. British Standards Institution. BS 1722-12: Specification for Timber Fences — Wood and Plastic Composite Fence Systems. BSI, London.
2. American Society for Testing and Materials. ASTM D7032: Standard Specification for Establishing Performance Ratings for Wood-Plastic Composite Deck Boards and Guardrail Systems. ASTM International, West Conshohocken, PA.
3. European Committee for Standardization. EN 15534-1: Composites Made from Cellulose-Based Materials and Thermoplastics — Test Methods for Characterization of Compounds and Products. CEN, Brussels.
4. Forest Stewardship Council. FSC Controlled Wood Standard FSC-STD-30-010. FSC International, Bonn.
5. U.S. Department of Agriculture Forest Service. Wood Handbook: Wood as an Engineering Material. General Technical Report FPL-GTR-190, Forest Products Laboratory, Madison, WI.
6. Klyosov, Anatole A. Wood-Plastic Composites. John Wiley & Sons, Hoboken, NJ.
7. Pendleton, Douglas E., Sherwood, Tom A., and Hood, James P. "Performance of Wood Plastic Composite Lumber in Exterior Applications." Forest Products Journal, vol. 52, no. 6, 2002, pp. 8–14.
Send Inquiry
You may like